Category: Blog

  • actions-setup-perl

    actions-setup-perl

    Main workflow

    social preview

    Perl 5 camel from perl-assets, license CC-BY 4.0

    This action sets by perl environment for use in actions by:

    • optionally downloading and caching a version of perl
    • registering problem matchers for error output

    Usage

    See action.yml

    Basic:

    steps:
      - uses: actions/checkout@v4
      - uses: shogo82148/actions-setup-perl@v1
        with:
          perl-version: "5.38"
      - run: cpanm --installdeps .
      - run: prove -lv t

    Install CPAN Modules from cpanfile and cache them:

    steps:
      - uses: actions/checkout@v4
      - uses: shogo82148/actions-setup-perl@v1
        with:
          perl-version: "5.38"
          install-modules-with: cpanm
          install-modules-args: --with-develop --with-configure
      - run: prove -lv t

    Matrix Testing:

    jobs:
      build:
        runs-on: ${{ matrix.os }}
        strategy:
          matrix:
            os: ["ubuntu-latest", "macos-latest", "windows-latest"]
            perl: ["5.38", "5.36", "5.34"]
        name: Perl ${{ matrix.perl }} on ${{ matrix.os }}
        steps:
          - uses: actions/checkout@v4
          - name: Set up perl
            uses: shogo82148/actions-setup-perl@v1
            with:
              perl-version: ${{ matrix.perl }}
          - run: perl -V
          - run: cpanm --installdeps .
          - run: prove -lv t

    Use Strawberry Perl on Windows

    actions-setup-perl uses the binaries customized for GitHub Actions by default. If you want to use Strawberry Perl on Windows, add distribution: strawberry into the “with” section.

    steps:
      - uses: actions/checkout@v4
      - uses: shogo82148/actions-setup-perl@v1
        with:
          perl-version: "5.32"
          distribution: strawberry
      - run: cpanm --installdeps .
      - run: prove -lv t

    This option is available on Windows and falls back to the default customized binaries on other platforms.

    Supported Platforms

    The action works for GitHub-hosted runners.

    Operating System Supported Versions
    Linux ubuntu-22.04, ubuntu-24.04
    macOS macos-13, macos-14, macos-15
    Windows windows-2022, windows-2025

    Self-hosted runners are not supported.

    Action inputs

    All inputs are optional. If not set, sensible defaults will be used.

    perl-version

    Specifies the Perl version to setup. Minor version and patch level can be omitted. The action uses the latest Perl version available that matches the specified value. This defaults to 5, which results in the latest available version of Perl 5. In addition, the value latest is available, the actions uses the latest available version of Perl including 5, 7 or later major versions.

    perl-version-file

    Specifies the path to the version file such as .perl-version.

    distribution

    Specify the distribution to use, this is either default or strawberry. (The value strawberry is ignored on anything but Windows.)

    • Default: default

    multi-thread

    Enables interpreter-based threads (ithread) options (-Duseithreads). true and false are accepted.

    • Default: depends on platform. On Linux and macOS, the default value is “false” (ithread is disabled). On Windows, the default value is “true” (ithread is enable) for fork emulation.

    install-modules-with

    Install CPAN modules from your cpanfile with the specified installer. cpanm(App::cpanminus), cpm(App::cpm), and carton(Carton) are available. CPAN modules is installed into ${working-directory}/local/.

    • Default: Nothing. Any CPAN module is not installed.

    install-modules-args

    The argument for CPAN module installer.

    • Default: Nothing

    install-modules

    List of one or more CPAN modules, separated by white spaces (space or new line). They are installed local directory on your working directory.

    • Default: Nothing

    enable-modules-cache

    Enable caching of the local directory at the root of the working directory. true enables the cache and false disables it. The cache key will be generated by hashing the contents of cpanfile in the repository root. This is intended for preserving locally installed modules between builds, which reduces build times. See Caching dependencies to speed up workflows for more information.

    Warning: If your repository does not use a cpanfile or if it uses a subdirectory named local for a different purpose, you probably want to set this option to false to prevent old files from being cached unexpectedly between builds.

    • Default: true

    working-directory

    The working directory.

    • Default: .

    Action outputs

    perl-version

    The perl version actually installed. (e.g. "5.38.2")

    perl-hash

    The digest of perl -V. It is useful for the cache key, because this value vary the platform, the version of perl, the compiler option for building perl, etc.

    Supported Shells

    The GitHub runner come with a preinstalled version of Perl, used by the system Git. Unfortunately, some shell types prepend the directory containing the system Perl to the PATH which makes it impossible to use the Perl installed by this action.

    shell parameter Linux macOS Windows (default) Windows (Strawberry)
    bash ✔️ ✔️ 1) 1)
    pwsh ✔️ ✔️ ✔️ ✔️
    python ✔️ ✔️ ✔️ ✔️
    sh ✔️ ✔️ n/a n/a
    cmd n/a n/a ✔️ ✔️
    powershell n/a n/a ✔️ ✔️
    custom shell perl {0} ✔️ ✔️ ✔️ ✔️
    1. On Windows, the bash shell always gets /usr/bin prepended to the PATH which contains the system Perl.

    Pre-installed Scripts

    The following Perl scripts are pre-installed for convenience.

    Pre-installed Modules

    CPAN Modules

    Actions::Core

    Perl port of @actions/core.

    SYNOPSIS

    use Actions::Core;
    
    # Inputs/Outputs
    my $input = get_input('inputName', { required: true });
    my $boolean_input = get_boolean_input('boolean-input'); # accepts YAML 1.2 boolean values.
    set_output('outputKey', 'outputVal');
    
    # Exporting variables
    export_variable('envVar', 'Val');
    
    # Setting a secret
    set_secret('myPassword');
    
    # PATH Manipulation
    add_path('/path/to/mytool');
    
    # Exit codes
    set_failed(`Action failed with error ${err}`);
    
    # Logging
    debug('debug message');
    if (is_debug()) {
      # print verbose log
    }
    info('Output to the actions build log');
    
    # Annotation
    error('error')
    warning('warning');
    notice('notice');
    notice('add an annotation to files', {
      title => 'Title',
      file => 'filename.txt',
      start_line   => 1,
      end_line     => 1,
      start_column => 1,
      end_column   => 10,
    });
    
    # Manually wrap output
    start_group('Do some function');
    do_some_function();
    end_group();
    
    # Summary
    use Actions::Core::Summary;
    Actions::Core::Summary->new()
      ->add_raw("some text")
      ->add_code_block("print 'Hello';", "perl")
      ->add_list(['item1', 'item2', 'item3'])
      ->add_table([['1', '2', '3'], ['one', 'two', 'three']])
      ->add_separator()
      ->add_heading('heading')
      ->add_details('label', 'content')
      ->add_image('https://github.com/actions.png', 'alt', { width => "32", height => "32" })
      ->add_quote('text', 'cite')
      ->add_link("Example", "http://example.com")
      ->write();
    
    # Wrap Subroutines
    my $result = group 'Do something async' => sub {
      return 'some results';
    };
    
    # Custom Functions of actions-setup-perl
    # List Available Perl Versions
    my @available_perls_on_current_platform = perl_versions(); # ('5.34.0', '5.32.1', '5.30.3', '5.28.3', ...)
    my @available_perls_on_linux   = perl_versions(platform => 'linux');
    my @available_perls_on_darwin  = perl_versions(platform => 'darwin');
    my @available_perls_on_win32   = perl_versions(platform => 'win32');
    my @available_strawberry_perls = perl_versions(platform => 'win32', distribution => 'strawberry');
    my @including_patch_versions   = perl_versions(patch => 1); # ('5.34.0', '5.32.1', '5.32.0', '5.30.3', '5.30.2', ...)

    List Available Perl Versions

    Example matrix workflow of using perl_versions:

    jobs:
      list:
        name: list available perl versions
        runs-on: ubuntu-latest
        steps:
          - uses: shogo82148/actions-setup-perl@v1
          - id: set-matrix
            name: list available perl versions
            shell: perl {0}
            run: |
              use Actions::Core;
              set_output(matrix => {perl => [perl_versions()]});
        outputs:
          matrix: ${{ steps.set-matrix.outputs.matrix }}
    
      run:
        runs-on: ubuntu-latest
        needs: list
        strategy:
          fail-fast: false
          matrix: ${{fromJson(needs.list.outputs.matrix)}}
        steps:
          - uses: shogo82148/actions-setup-perl@v1
            with:
              perl-version: ${{ matrix.perl }}
          # do something

    Known Issues

    • On Windows, shell: bash steps continue to use the system perl #328

    License

    The scripts and documentation in this project are released under the MIT License

    The Raptor in social-preview.svg is licensed under the CC-SA License, Version 4.0 https://creativecommons.org/licenses/by-sa/4.0/. Copyright (C) 2012, Sebastian Riedel. https://github.com/kraih/perl-raptor

    Visit original content creator repository https://github.com/shogo82148/actions-setup-perl
  • PhysicsPrograms

    海外物理学项目申请经验 2018
    Overseas Graduate Programs in Physics

    作者 Authors

    梁师翎,张昌凯

    引言 Introduction

    本文介绍了物理背景的学生的各国的硕士博士项目申请,硕士为主。同时混入了几个人工智能硕士项目,为有意转专业的同学提供一定的信息。在附录有上海交大出的大学学术排名,在选校时可以参考。ARWU是学术排名,有意转行的同学们也可关注QS或US News给出的排名。本文申请的日期以2018年9月入学为准。语言成绩要求格式为 –/–,前为总分要求后为小分要求。

    免责声明 Warranty Statement

    本文所有内容均为作者(们)申请2018年海外项目的经验之谈,所提供信息可能在今后失去准确性。具体申请要求等请以官方给出的信息为准,本文作者(们)不对本文所提供信息的时效性与准确性提供任何形式的担保。

    基本策略 Basic Strategies

    现阶段物理学领域强校基本仍集中在欧洲和北美,因此初期可按欧洲与北美学校项目进行计划安排。北美项目的申请截止时间通常在12月;加拿大学校通常在12月1日,美国学校通常在12月15日,个别有12月20日或1月15日。而欧洲项目通常截止时间较晚,分散在2月至7月的各个时间点。因此,基本策略是先申请北美学校,再考虑欧洲项目。

    北美的学校通常只有PhD项目,因此对研究水平要求较高。欧洲硕博普遍分开,认为研究训练是博士阶段的任务,因此对学分要求较高。另外值得注意的是,北美大部分项目在12月都会截止,大部分结果在2月至3月初都会出,并且往往会要求在一定时间内确认是否接受;而欧洲许多优秀项目在4月乃至6月才开放申请。因此也需权衡在有可能拿到欧洲强校的情况下,是否接受北美弱校的offer。

    目录 Content

    英国 The United Kingdom

    英国学校非常多,但是考虑到其几乎不给非欧盟学生奖学金,这里只推荐两所CS相关项目,毕竟CS回本快。不关心费用的问题可以了解一下帝国理工和剑桥的物理硕士项目。英国的硕士学制都是一年,而考虑到下一步PhD申请,一年制的硕士会导致刚入学就要准备下一轮申请,对PhD申请非常不利。除了选择留在英国继续读自费PhD或直接工作的,英国硕士项目很容易导致硕士之后Gap一年。

    UCL – MSc Machine Learning

    UCL的ML master应该是这几个之中和工业界联系最紧密的。做出Alpha Go的Deep Mind和UCL有很强的联系,同时London也提供了很多的工作实习机会。之后留本校做PhD不多,不过自费的话门槛应该不高。英国相对来说工签不宽松,听说有些这个项目毕业的同学去了荷兰德国,这两个国家的工签都比较宽松。

    Edinburgh – MSc Artificial Intelligence

    爱丁堡的人工智能研究历史源远流长,在欧洲也有很高的声誉。但是地域来说爱丁堡相对于London缺少工作机会。爱丁堡的课程安排相对于UCL更加注重基础(个人感觉),也更加偏向学术方向,若想走学术向继续做PhD的同学,这个项目应该更加合适。听说爱丁堡的老师更偏向招收本校硕士读博,但考虑到本校硕士体量也很大,英国对中国学生的奖学金很不友好,找到全奖PhD的可能性还是不高,特别是对于本科从物理转过来的只有一年AI经验的学生。

    IC – MSc Physics with Extended Research

    IC在理论物理上还是有一个不错的组。这个项目的亮点在于有一年的extended research。一般的英国硕士项目只有一年,硕士论文暑期做,Gap还需要自己去找实验室打工。这个项目有一整年的研究,因此可以有更多产出,时间也更好安排,而帝国理工还是有一定的质量保证(教学上),课程安排看课程名也是非常诱人。

    Cambridge – Mphil Physics

    这里是两个项目,Mphil Physics是剑桥特别的硕士项目,一般英国的硕士是MSc,但剑桥的物理硕士只有两类,Mphil或者MASt。Mphil在别的国家一般作为PhD中途退出所拿到的硕士学位,而MASt是剑桥独有的短期学位。MASt是授课为主项目,申请难度稍小,但是课程时间太短,所以除了有剑桥加成以外意义不大。Mphil对标MSc,可能再多一些Research的内容,还是比较充实。

    瑞士 Switzerland

    瑞士这个国家分为三大块儿,法语区,德语区与意大利语区。从人口比例而言,这个国家主流还是德语区和法语区。瑞士政府成立了两所联邦理工学院,分别在德语区苏黎世(Zürich)的 ETH Zurich 和法语区洛桑(Lausanne)的 EPFL。

    这两所学校经费相同地位相同,其中文名分别是苏黎世联邦理工学院(Eidgenössische Technische Hochschule Zürich)与洛桑联邦理工学院(École Polytechnique Fédérale de Lausanne)。两个的简写看起来有区别主要是因为一所名字是法语另一所是德语。有趣的是在ETHz的官方文件中有时称EPFL为ETH Lausanne 。ETH Zurich在物理史上是很有名的,爱因斯坦的故事便发生在这里。而现在ETH Zurich也是欧洲大陆最好的一所大学,在欧洲的地位和美国MIT类似。而EPFL历史上名气更小,严格来说是上个世纪正式成立的,因此会被排到top 50 young university的第一名。而近些年EPFL发展势头很猛,这两年排名一路上升。考虑到政府对这两所学校的定位,其水平应该是差别不大的。考虑申这两所学校的同学主要根据自己喜欢的文化氛围(法国和德国)以及感兴趣的老师选择就好。以及ETH Zurich的申请相对来说繁琐很多,这也可能作为一个选择的阻碍。

    因为制度的问题这边读PhD必须要先读一个master(貌似清北过来的牛人可以直接读PhD,应该属于例外情况)。这边的master学制两年,课业压力较大,考试几乎都是以面试的形式进行。

    EPFL – MSc Physics/Applied Physics

    • Deadline: 15 Jan 2018
    • Decision: early April 2018
    • 申请材料: TOEFL
    • 花费: ~800 CHF注册费 + 生活费 (共约10-15万RMB每年)

    EPFL的申请全部为在线申请。EPFL在日内瓦湖边的洛桑,一个欧洲小城。和ETHz比较起来优势在于有法语区的传统统计物理强项。次项目课程安排比较合理,总共两年取得120学分:

    • 专业课程38学分 (一门课程一般4学分)
    • 人文课程+项目6学分,
    • 科研实习项目*Research Project)16学分,在研究生第一年上下两个学期分为两个项目各位8学分完成
    • 毕业论文30学分
    • 剩下30学分有三种选择:
      • 选择辅修(Minor)其他专业
      • 工业界实习
      • 专项项目(更细化方向的科研项目,以及该领域的一些PhD课程)

    学校位于瑞士法语区,但是城市整体来说英语不错,校园内部更是没有问题。学校也提供了免费的法语课程可以在入学前的暑假参加。瑞士最大的问题在于租房,若申请此学校务必关注找房子的问题,在四月五月六月注册几个学生公寓(非EPFL经营),排上waitlist,并按要求更新自己的信息。若错过了学生公寓,则需到了洛桑找到短租后四处看房,强烈不建议。

    ETH Zürich- MSc Physics

    • Deadline: 15 Dec 2017
    • Decision:18年二月底
    • 材料:GRE, TOEFL(100,入学前达到要求即可), GRE sub, 高中毕业证
    • 项目主页:https://www.phys.ethz.ch/studies/master.html)
    • 花费: ~800 CHF注册费 + 生活费 (共约10-15万RMB每年)

    ETHz需要邮寄申请材料,且需要较多相关证明(比如高中毕业证,需公证处翻译)。整个申请过程比较繁琐,需要在申请系统填写大学每门课的具体教学内容。ETHz作为欧洲大陆最好的学校还是很值得申请的。
    相关网页:申请材料

    中国香港 Hong Kong

    香港距离大陆太近,而且也不算出国,但是由于其申请较之于大陆高校是独立的这里单独拿出来说。香港就物理来讲有两所高校不错,香港科技大学和香港中文大学。这两所大学会举办暑期的Summer Camp邀请学生过去面试。到这两所学校主要是PhD项目,但也可选择Mphil(两年硕士)项目,当然也有完全是学校创收性质的MSc项目。不过大多数老师更偏向于招收博士。两个项目几乎相同,具体就是看自己感兴趣的老师了,因此这里只介绍一所。

    香港科技大学 HKUST – PhD/Mphil Physics

    • Deadline:2017年四月底
    • Decision: 2017年七月中Summer Camp给结果
    • 申请材料:入学须托福90

    这个项目的待遇给的不错,离大陆也近,城市也很棒。学校给的基础工资是14k港币,拿到香港政府的奖学金是20k港币。学校是建在海边的,也是在山上的。整个学校立体结构非常复杂,沿山而建,主体是一栋特别复杂的大楼,容易迷路,需要靠学生自制的导航软件。

    这所学校会在暑假举办summer camp,在大三下的时候报名,大概是三四月,然后进入shortlist后会被邀请去参加面试。面试的机票自理,学校提供学生宿舍作为住宿。

    包含第一天签到总共四天活动,第二天为院系整体的宣讲会以及餐会,第三天是笔试以及老师的个人实验室介绍,第四天是早上的面试以及下午的最终结果通知。笔试问题不难,稍微复习下四大力学便可,面试内容大概是聊聊家常问问你有没有去美国的打算,然后再加上两个简单的基础问题以及和你所声明的感兴趣的方向有关的小问题。最终结果分为两个档次,高档的为直接录取然后你挑导师,低档的为你找到愿意带你的导师后便可以录取你。

    因为每年会出现很多拿着香港科技大学offer作为保底的然后拿到其他美国offer后直接跑路的人,因此在整个过程中老师都很在意学生的意愿程度。在summer camp之后也仍然有常规申请途径,因此错过了summer camp也还是有机会申请这所学校。

    日本 Japan

    日本我只了解国东京大学以及OIST,其他学校的英语项目大概不是那么靠谱。这两所大学结构完全不同,因此需要完全分开说名。

    东京大学 – Master/PhD

    东大的申请陶瓷是很必须的,学校要求你在申请之前联系好潜在的导师。同时东京大学要求GRE和GRE sub。注意如果是生物物理方向在GRE physics之外还需要GRE biology。申请时段有很多,对应着不同的奖学金,需要仔细研究。

    OIST – PhD

    OIST这所学校这两年得到了一些关注,主要是从知乎上的几篇回答带起的热度。这所学校规模很小,只接受PhD同时没有院系结构。学校成立于2011年,其目的是为了促进冲绳当地发展以及交叉学科发展。这个学校的结构以及办学概念都非常新。在知乎上有对这个学习很好的介绍

    学校每年有两次admission workshop,分别在二月中旬(申请deadline为前年十一月中旬)和六月中旬(deadline为四月中旬)。具体申请日期安排可以参见https://admissions.oist.jp/apply。在申请截止日期约两周后回出结果,通过邮件邀请进入short list的学生到冲绳(Okinawa)参加admission workshop,往返机票以及那几天的住宿等相关开销皆有OIST支付。

    Admission workshop持续一周,时间很经凑。在到达后头两天有一些比较概括的讲座,关于OIST的学习生活经费等。在第三天会有持续一整天的面试,每个学生会与五位老师分别进行半个小时的交流,话题包括来OIST的理由这种开放性话题,也有对学生之前的研究经历的追问。OIST希望学生有一定的交流能力,并能很好地将自己的研究介绍给非自己领域内的人,因此面试的老师不一定是自己同方向的。第四天会有各个Unit的PI介绍他们的研究方向,以及实验/计算部门介绍科研相关支持的提供。第五天便是离开OIST去机场了。

    学生每年得到的资助为2,400,000日元(约14.4万RMB),在扣除税、学费、房租(学校对校内租房有补助)后能有1,700,000日元(约10万RMB)。虽然奖学金和美国高效持平但是考虑到这边物价很低以及住房非常便宜,拿到手里可以花的钱比起美国会多很多。 学校发展势头不错,这两年也在积极扩招。除了学校位置太偏(冲绳相对于世界以及学校相对于冲绳),其他的面向都是很不错的。不妨申请前去看看。

    加拿大 Canada

    加拿大作为北美两国,一般申请美国也会顺便申请加拿大。加拿大的申请相对于美国好处在于某些大学是不需要GRE或者GRE sub的。这里推荐三所学校,以及一个理论物理的研究所。加拿大的学校截止日期一般都在十二月初。

    Toronto – MSc Physics \to\to PhD

    • Deadline: 1st Dec 2017
    • Decision: 2018年二月底三月初
    • 花费:全奖 22k 加拿大刀每年

    多伦多大学的物理是从硕士阶段明确提供全奖的,每年提供免学费之后22k加币,基本生活可以保障。虽然申请的时候有master这个选择但是本质和美国的直博应该差距不大。这边的master只有一年因此不是作为跳板的好选择。和美国的众多项目比较,其优势为不用GRE。

    Waterloo

    这所大学排名不高,但是它旗下有诸多各个方向的研究所。在囊括了这些研究所后,其实力依然强劲。而且学校网站前端做得相对专业,这也反映这所学校至少不会太差。

    UBC

    和多伦多大概差不多,地处温哥华气候会好很多。申请截止日期相同。这所学校的量子计算量子信息非常强势,可以考虑。和多伦多不同的是这所学校需要申请之前联系导师。但导师的首肯并不意味着录取。

    普利米特理论物理研究所 Perimeter Institute

    有奖硕士项目,每年3万美金,包吃住还送电脑。理论物理的天堂,拥有各种方向的理论物理世界级资源。值得了解,但每年只收30人,难度很大。

    荷兰 the Netherlands

    荷兰学着英国的教育产业化现在也是越来越贵了。荷兰的硕士一年学费更低,但是学制更长,一般都是两年。每年的学费大概在18k欧元左右。荷兰相对于英国的好处在于奖学金更好拿一点,两年的master也不至于那么慌张,同时工签政策友善许多。一般在瑞士英国没法留下来工作的都会转战荷兰和德国,这两个国家虽然不是英语母语国家但是英语水平非常高。而且荷兰的包容度也几乎是欧洲最高的,非常舒适。荷兰的大学还是蛮多的,比较出名的有阿姆斯特丹大学,Delft以及Utrecht等,世界排名还不错,国际化程度也很高,申请难度也不是很大。

    法国 France

    法国的发展非常集中,几乎所有资源都在巴黎。曾经的欧洲最古老也是欧洲最好的学校在上个世纪六十年代被拆成了11所学校。由于历史原因巴黎的各个大学/研究所规模都非常小,因此在国际排名上非常吃亏,但是其水平是非常高的。虽然最近政府在努力进行合并但是并不是很顺利。巴黎在物理方向上最好的学校便是巴黎高等师范(ENS)了。其次还有一些对英语支持不那么好的大学,比如巴黎六大。巴黎X是一所很好的工程师大学,想转专业的同学也可以了解。

    ENS – ICFP Masters program

    • Deadline:1st May 2018
    • Decision:七月初
    • 花费:无学费,有一些奖

    巴黎高等师范学院,这所学校规模特别小,但是特别厉害。巴黎高师的数学是世界顶尖的,而物理也是一流。法国的传统强项是统计物理,因此对这方面感兴趣的同学可以着重关注。ENS的申请难度或许是欧洲最高的,之前国内申过来的据说主要是清北科,英国过去的学生很少,还没有统计到过成功案例。ENS的硕士项目安排非常合理,有数次实习(进实验室)机会,对之后的申请会很有帮助。

    International Master, Physics of Complex System

    这是意大利和法国几所大学和研究所联合的项目(ICTP cooperates with SISSA Trieste, Politecnico di Torino University and a consortium involving Universities Pierre & Marie Curie (Paris 6), Paris Diderot (Paris 7), Paris-Sud (Paris 11) and the École Normale Supérieure at Cachan ),几乎涵盖了两个国家最好的大学,而这个复杂系统这个方向也是这两个国家在物理领域最为擅长的方向之一。这个项目毕业可以获得意大利和法国的两个学位硕士学位(M1和M2),若参加一系列考试还可以获得一个意大利的工程学位。本科课程足够多以及非常优秀的学生可以直接入学法国,一年毕业得到法国的M2学位(具体法国的硕士学制可自行查询)。从国内访问主页有点困难,可能需科学访问。法国方面的网站特别困难,需耐心。项目带奖,含金量也非常高,特别推荐对统计物理感兴趣的同学申请这个项目。

    课程的结构如下:

    The programme is organized in three semesters:

    • a first semester in Trieste (at SISSA and ICTP).
    • a second semester in Torino at the Politecnico di Torino University;
    • a third semester in Paris at a consortium involving Universities Pierre & Marie Curie (Paris 6), Paris Diderot (Paris 7), Paris-Sud (Paris 11) and the École Normale Supérieure at Cachan.
      Finally, a fourth semester is devoted to a European multidisciplinary Spring School–where students can choose between various short courses–and to a research stage.

    德国 Germany

    德国的大学因为国家教育理念以及各地发展比较平均,水平都差不多,因此不像其他国家有那种TOP2的超级大学。虽然德国的大学在排名上不占优势,但是每个学校都比较优秀,因此选择特别多。德国的学校申请截至一般在当年的五月到七月,然后材料审核会在这之后展开。因此这个时间和其他的offer并不兼容,等到德国的结果下来其他国家的签证都办好了。不过这个时间也为同学们在各国申请都没拿到offer的情况下有了抢救一下的选择。检索德国相关项目可以从马普所(Max Plank Institute)出发,很多项目和马普所有合作关系。

    TUM/LMU – Theoretical and Mathematical Physics

    欧洲三大顶级理论物理项目之一(其它两个分别是 ENS Pairs 的 ICFP 和 意大利的 ICTP)。这个项目会对申请者的数学背景要求较高。这里的数学背景尤其特指成绩单上具有学分的数学课程数量,因此对国内背景的,没有辅修数学学位的申请人并不友好。经验证明其它非学分形式的证明(paper,notes一类)并不管用。

    Ludwig-Maximilians-Universität München

    二战前两大量子物理世界级中心之一(另一个是位于 Copenhagen 的 Niels Bohr Institute)。虽然在二战中失去了大部分学术力量,但经过几十年的发展,这里的量子物理依然具有强大的竞争力。

    本项目申请难度中等,GPA没毛病,学术上有亮点即可。需要特别注意的是,本项目需要发出两份申请,其中一份需要通过邮寄给 International Office 用于审核成绩和学位是否达到学校标准;另一份网上提交给物理系进行 aptitude assessment。德国学校给offer时间比较较晚。LMU今年在7月23日才完成审核,7月31日才给出最终结果。当然,开学也比较晚,一般是每年10月。

    Bonn-Cologne Graduate School

    世界级数学中心,对数学物理及理论物理有兴趣的同学可以考虑。申请难度中等,GPA正常,有学术亮点即可。网上申请,注意需要提供高中毕业证(School Leaving Certificate)。7月初发offer,之后需邮寄相关正式文件。

    Other German Universities

    德国大学比较容易卧虎藏龙,很多时候在一些并不见经传的大学里有某偏僻领域的世界级中心,主要可以参考 Max Plank Institute 的各分所。其它值得考虑的学校包括 Heidelberg Universität, Universität Hamburg: UHH, Goethe-Universität Frankfurt等。寻找德国学校时也一定注意相关领域的 Max Plank Institute 的分所。对于 Graduate Program,这一点很重要。

    意大利/西班牙 Italy/Spain

    调查过一次意大利和罗马英语硕士项目,这里就稍微提一下,可以一定程度的备选项目。意大利相关项目检索可以重点关注关键词SISSA Trieste ,为意大利很重要的一个研究所,很多硕士项目都和这个研究所有或多或少关系。

    罗马大学

    这个是罗马大学(上交学术排名-物理 29名)的英语项目,截止日期是四月十五号(http://en.uniroma1.it/node/13540),在线申请。

    Autonomous University of Madrid

    Autonomous University of Madrid ,西班牙的一所大学,上交物理排名51-75,五月份截至。

    University of Bologna

    西班牙的一所大学,上交物理排名51-75,五月份截至。

    比利时 Belgium

    比利时有两所不错的大学,鲁汶大学(KU Leuven)与布鲁塞尔自由大学。这里要留意的一点事严格上来说布鲁塞尔自由大学有两所,一所法语的一所荷兰语的,貌似是因为学校的语言不同而在上个世纪分了家。物理上法语布鲁塞尔自由大学是很出名的,以及曾经的诺贝尔奖得主普利高进出自此校,因此我对这个学校一直很向往,但是该学校没有英语项目。鲁汶大学的好处在与其提供了一个英文的学费很低的人工智能master,在这个全民人工智能的年代大概是最有性价比的项目了。

    KU Leuven – MSc Artificial Intelligence

    这个项目的包容性很大,有三个主要的方向:

    1. Engineering and Computer Science (ECS),
    2. Speech and Language Technology (SLT),
    3. Big Data Analytics (BDA).

    对物理背景的学生1/3都是比较好的选择,具体课程区别可以在网站继续了解。

    Visit original content creator repository
    https://github.com/Shiling42/PhysicsPrograms

  • go-artifactsmmo

    Cover Image

    ⚔️ Artifacts SDK in Go [WIP]

    Go Report Card codecov

    go-artifactsmmo is a Go SDK for interacting with the ArtifactsMMO API, a unique MMORPG where the entire game is played by programming your own client or bot to control your character. Whether you’re a coding newbie or a veteran at handling APIs, this project simplifies communication with the game.

    🌍 What is ArtifactsMMO?

    ArtifactsMMO is a MMORPG where you code your own bot or client to play. Picture an epic quest, but instead of pushing buttons, you’re writing code! Manage your character, explore, fight, and interact with the game’s universe—all through API calls.

    🔧 Documentation

    🚀 Installation

    Add go-artifactsmmo to your project:

    go get github.com/0xN0x/go-artifactsmmo

    📖 Usage

    Here’s a quick example to get you started:

    package main
    
    import (
        "fmt"
        "github.com/0xN0x/go-artifactsmmo"
    )
    
    func main() {
        client := artifactsmmo.NewClient("your-api-token", "your-character-name")
        character, err := client.GetCharacterInfo()
        if err != nil {
            fmt.Println("Error:", err)
            return
        }
        fmt.Printf("Welcome, %s (XP: %d/%d)!\n", character.Name, character.Xp, character.MaxXp)
    }

    ⚙️ Features

    • API token authentication

    📅 Todo

    • API token authentication
    • Continuous Integration
    • Movements
    • Fights management
    • Gathering ressources
    • Crafting
    • Tasks (quests) support
    • Inventory
      • Equipments
    • Bank
    • Recycling
    • Grand Exchange
    • Events
    • Safe rate limiting
    • Examples
    • Unit test (cov ~> 80%)

    📚 Examples

    🛠️ Work In Progress

    This SDK is actively being developed! Expect frequent changes, but we’re working hard to deliver a stable experience soon. 🚧

    💻 Contributing

    Contributions are more than welcome! If you have suggestions or patches, feel free to open a PR. Please try to follow Go best practices and aim for 80% or higher test coverage with your changes.

    ❤️ Contributors

    ⚖️ License

    This project is licensed under the GPLv3 License.

    Visit original content creator repository https://github.com/0xN0x/go-artifactsmmo
  • gazebo-ros-actor-plugin

    Gazebo ROS Actor Plugin

    About

    The gazebo_ros_actor_plugin package contains a plugin for Gazebo Classic (Version 11) and a ROS package that enables dynamic control of actors in Gazebo. The plugin allows you to control actors using either position or velocity commands.

    System Requirements

    Before using this package, make sure that you meet the following requirements:

    • ROS 1 Noetic
    • Gazebo Classic (Version 11)
    • gazebo_ros_pkgs

    Installation

    If you want to use this package with a Docker container, follow these steps:

    1. Build the Docker image using docker build -t bcr_ros-noetic_gz-11:latest .
    2. Launch the container by running cd docker_scripts and ./launch_container.sh. This will mount the package to /root/ros2_ws/src/.
    3. To enter a bash session, run ./bashing_container.sh.
    4. To stop the container, run ./stop_container.sh.

    Usage

    Running the gazebo_ros_actor_plugin

    To use the gazebo_ros_actor_plugin, follow these steps:

    1. Build the package using catkin_make.

    2. Source setup.bash for the workspace containing this package.

    3. Edit the parameters in the move_actor.world file and choose the method of subscription using the follow_mode tag corresponding to the plugin of the actor actor1. It could be either subscribing to path or velocity commands.

    4. Launch the sim.launch file by running:

      roslaunch gazebo_ros_actor_plugin sim.launch

    Running the Publishers

    To use the plugin, you need to start a publisher that sends velocity or path commands to the actor. This package includes two example publishers:

    Velocity Publisher

    To run this publisher, enter the following command:

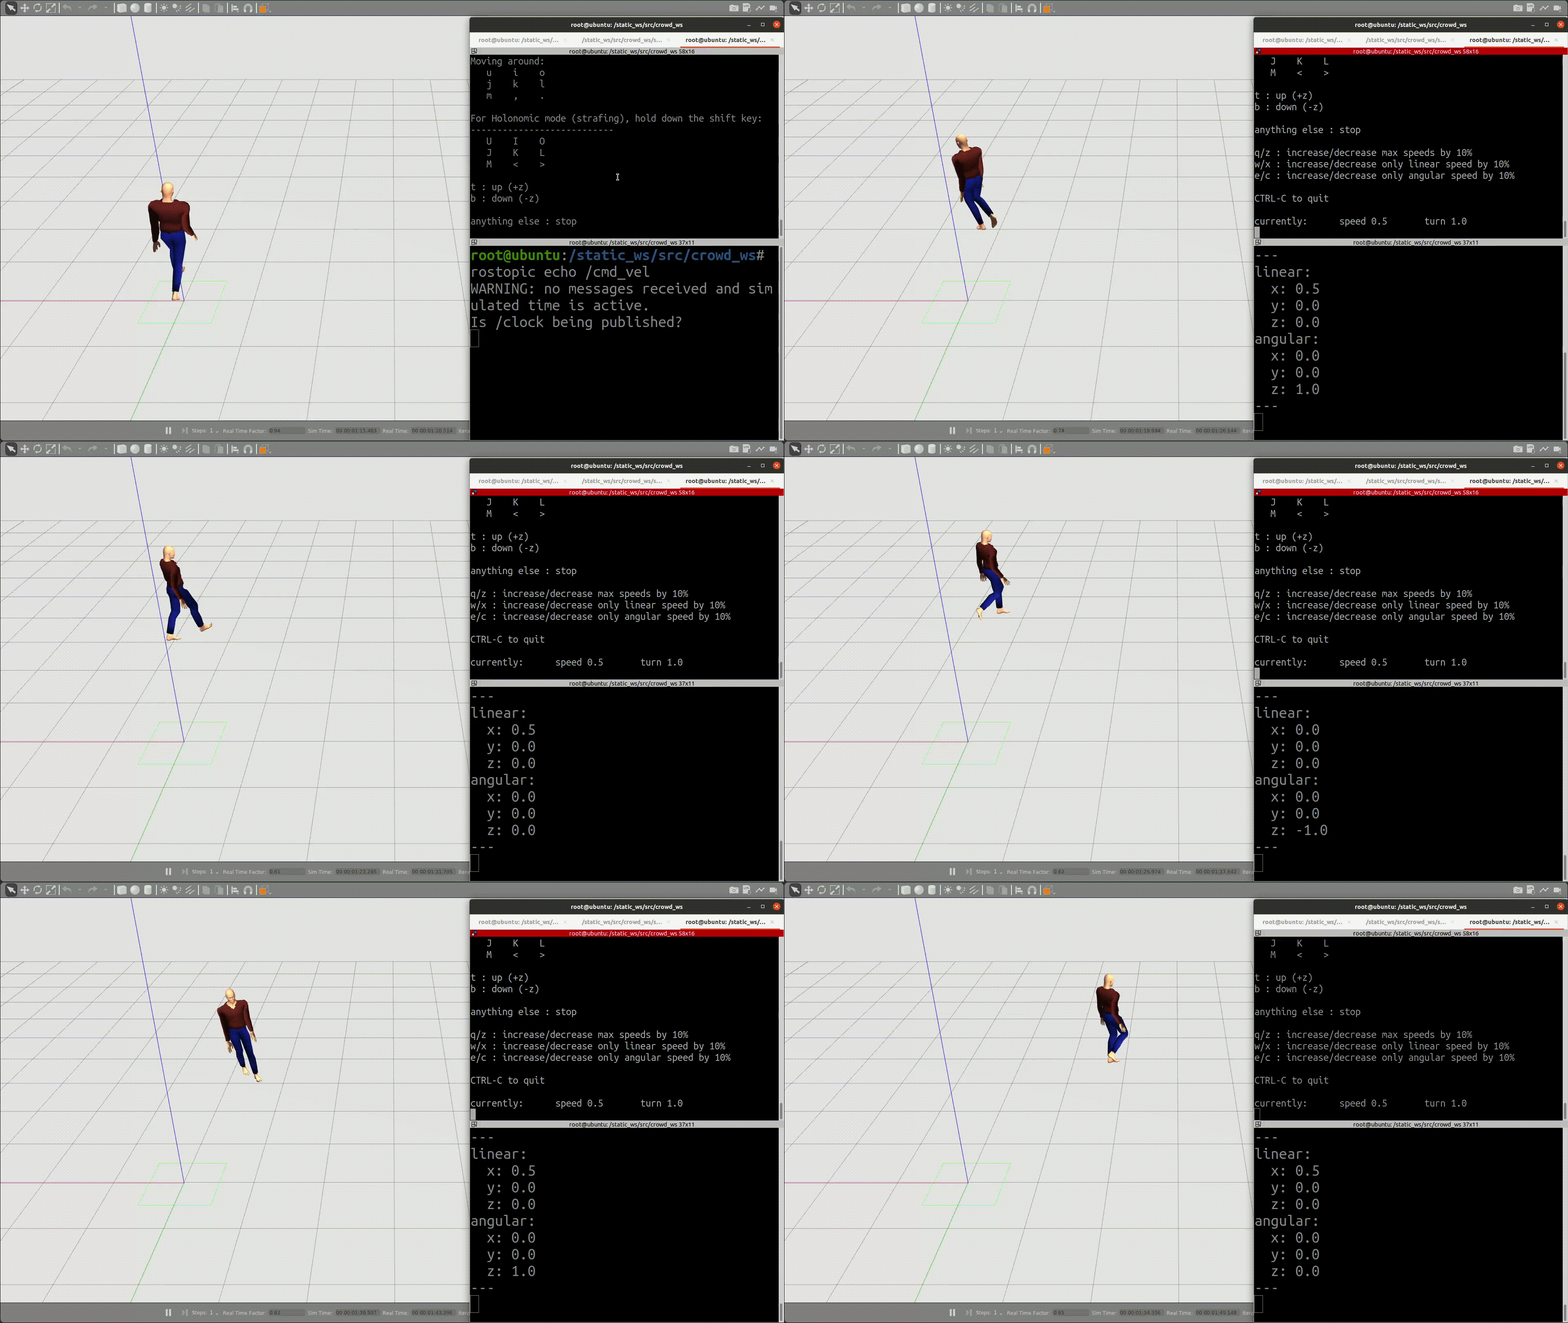
    rosrun teleop_twist_keyboard teleop_twist_keyboard.py
    

    Then give keyboard inputs to command linear and angular velocities. This publisher is based on the ros-noetic-teleop-twist-keyboard package.

    Velocity control of actor

    Path Publisher

    To run this publisher, enter the following command after sourcing the workspace:

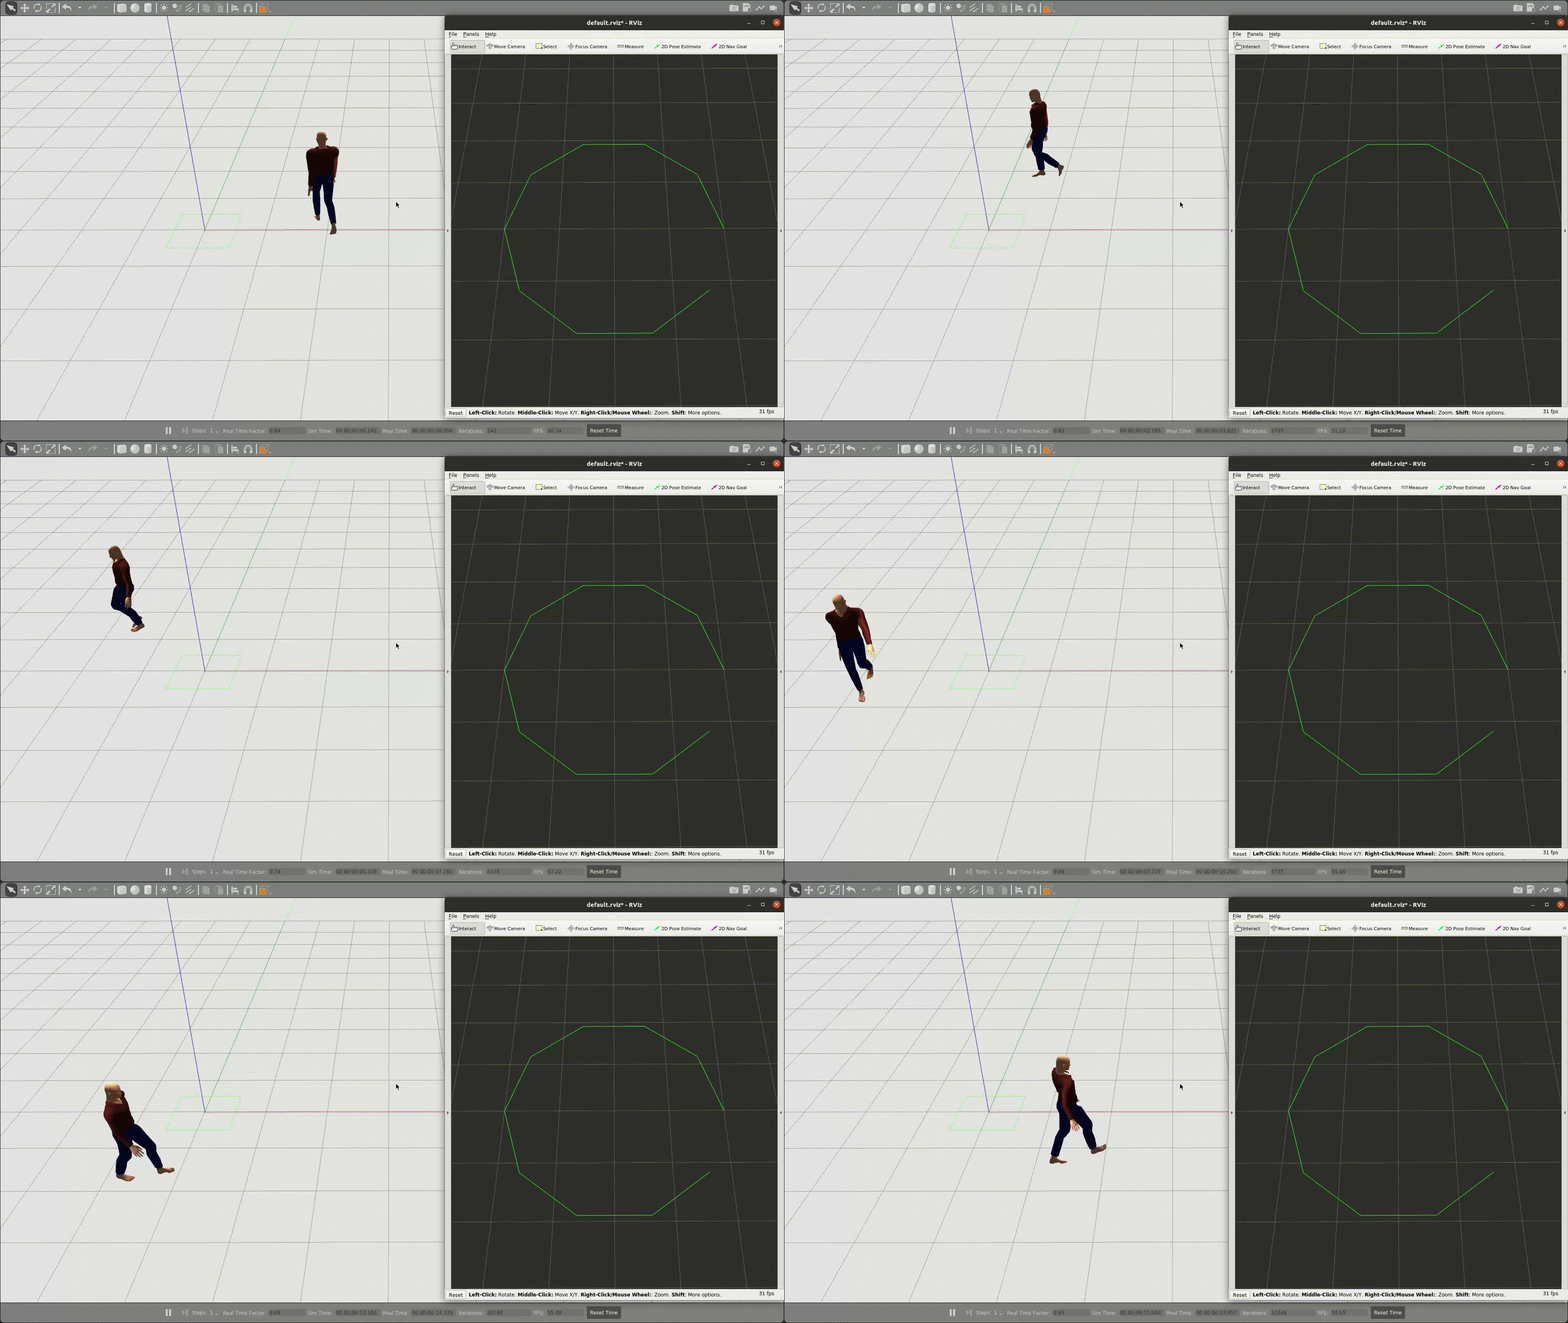
    rosrun gazebo_ros_actor_plugin path_publisher.py
    

    Note that the path_publisher.py file can be found in the /scripts directory in the package.

    Path control of actor

    Working with different skins

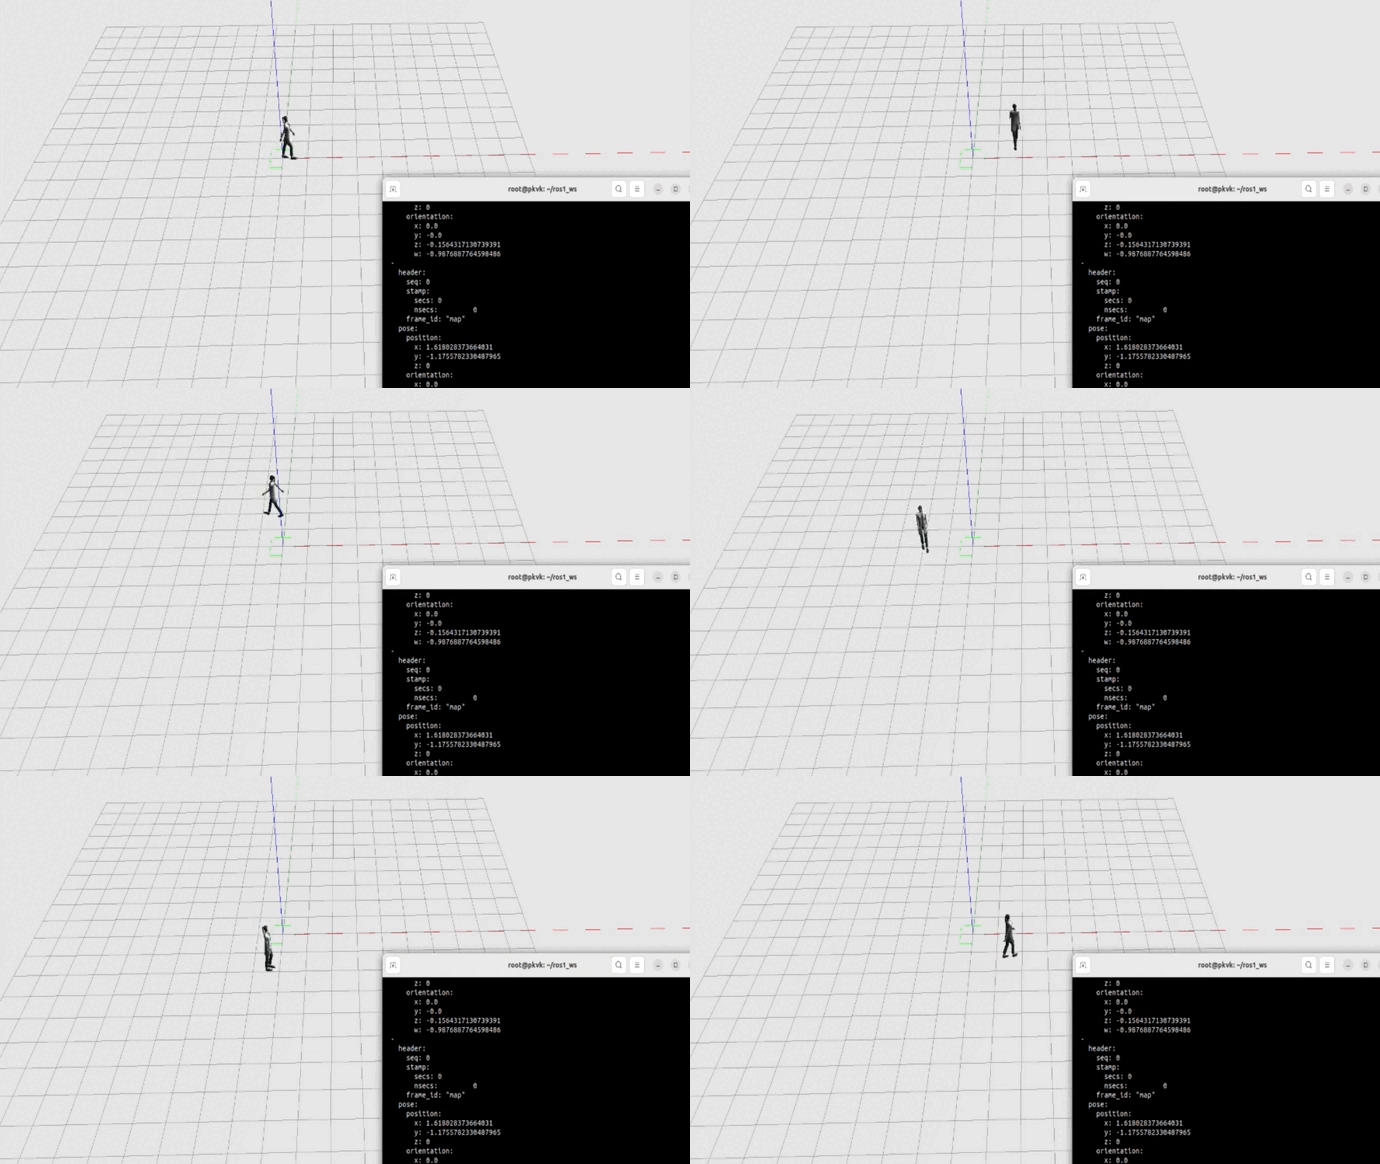
    To work with different skins on the actor change the default_rotation parameter in the world file to adjust the actor.

    Different Skin Actor

    Parameters in move_actor.world

    The move_actor.world file contains the following parameters:

    • follow_mode: The mode in which the actor will follow the commands. It can be set to either path or velocity.
    • vel_topic: The name of the topic to which velocity commands will be published. The default topic name is /cmd_vel.
    • path_topic: The name of the topic to which path commands will be published. The default topic name is /cmd_path.
    • animation_factor: Multiplier to base animation speed that adjusts the speed of both the actor’s animation and foot swinging.
    • linear_tolerance: Maximum allowed distance between actor and target pose during path-following.
    • linear_velocity: Speed at which actor moves along path during path-following.
    • angular_tolerance: Maximum allowable difference in orientation between actor’s current and desired orientation during rotational alignment.
    • angular_velocity: Speed at which actor rotates to achieve desired orientation during rotational alignment.
    • default_rotation: Angle offset for skin collada files. It’s set to 1.57 by default but should be adjusted for the skin. It can be changed by adding or subtracting pi/2 to make the actor stand upright. For “DoctorFemaleWalk” actor, the value is “0”.

    ROS API

    The gazebo_ros_actor_plugin subscribes to information from the following inbound topics:

    • /cmd_vel: to receive linear and angular velocity commands
    • /cmd_path: to receive path commands

    Note that the names of the topics can be overridden in the move_actor.world file present in this package’s /config directory.

    Additional Resources

    For more detailed information and examples, please refer to the following resources:

    • Detailed Article: This article provides in-depth support and explanation of the contents of this repository.
    • Demo Videos: This video playlist demonstrates Actor Plugin in action and also shows potential use case of this work, showcasing crowd behavior.

    References

    Here are some additional references that may be useful:

    Visit original content creator repository https://github.com/blackcoffeerobotics/gazebo-ros-actor-plugin
  • email-spy

    Email Spy

    If you need a more customized solution for lead-generation then you should check out Intoli. We aggregate data from numerous sources to help companies with marketing, competitor research, and product development. We would love to talk more about how Intoli can work with your business.

    Email Spy

    Email Spy is a browser extension that lets you find email addresses for any domain with a single click. This can be very useful when doing marketing and lead-generation research for your business. Even if there’s an easy to find contact email or form on a company’s website, it is often much more effective to target your email to the correct person.

    Features

    • Works with both Chrome and Firefox.
    • Finds email addresses with a single click.
    • Supports email templates to prepopulate email drafts.
    • Completely free and open source.
    • Easily extendable with React and ES6.

    Installation

    The extension can be installed drectly from the Chrome Web Store for Google Chrome users and from the Addons.Mozilla.Org for Firefox users (note that the Firefox add-on is currently pending review by the Mozilla team). Microsoft Edge is not currently supported but it might be in the future if enough people express interest.

    Features and Usage

    Basic Usage

    Once installed, the Email Spy extension will add an icon to the toolbar of your browser window that looks like this.

    Small toolbar icon

    Clicking on the icon will begin a search for email addresses at the domain of the website that’s open in the current browser tab. The results look like this

    Search results

    and each email address is a mailto: link that will open in your email application.

    The numbers next to each email address represent the number of references to that email address that were found. Clicking on the expansion arrow to the left of an email address allows you to see a list of the URLs where the email address was referenced. You can click on any of these URLs to open them in a new tab for further inspection or simply mouse over them to see a small snippet of context from the linked page.

    Snippet tooltip

    Advanced Usage

    It can be convenient to use a basic email template as a starting point when you’ll be sending a large number of similar emails. Email Spy includes support for specifying an email template on its options page which can be opened either by right clicking on the toolbar icon and selecting Options or by clicking on the small gear icon in the upper right corner of the Email Spy results popup.

    Options page

    After entering and saving your email template, the subject and body of each email will automatically be filled for you when you click on an email address in the main results popup.

    Development Setup

    If you only need to use Email Spy as-is then it’s much easier to just install the extension yourself from the Chrome web store. These steps are only necessary if you would like to add custom functionality or contribute back to the project.

    First, you will need both node and npm (or yarn, pnpm, etc.) installed. You can then clone the project and install the dependencies by running

    git clone git@github.com:sangaline/email-spy.git
    cd email-spy
    npm install # or `yarn install`, `pnpm install`, etc.

    The project can then be run in development mode with hot-reloading enabled using npm run start or built for production with NODE_ENV=production npm run build. Both of these commands will output the extension in the build/ subdirectory of the project. The unpackaged extension will then need to be added to Chrome which can be done by following these directions from Google.

    Contributing

    Contributions are welcome but we ask that you create an issue before submitting a pull request.

    Visit original content creator repository https://github.com/sangaline/email-spy
  • jpx

    JPX

    Build Status Maven Central Javadoc

    JPX is a Java library for creating, reading and writing GPS data in GPX format. It is a full implementation of version 1.1 and version 1.0 of the GPX format. The data classes are completely immutable and allows a functional programming style. They are working also nicely with the Java Stream API. It is also possible to convert the location information into strings which are compatible to the ISO 6709 standard.

    Besides the basic functionality of reading and writing GPX files, the library also allows manipulating the read GPX object in a functional way.

    Dependencies

    The JPX library needs no external dependencies. It only needs Java 17 to compile and run. It also runs and compiles with Java 21 and Java 23.

    Building JPX

    For building the JPX library, you have to check out the master branch from GitHub.

    $ git clone https://github.com/jenetics/jpx.git
    

    Executing the tests:

    $ cd jpx
    $ ./gradlew test
    

    Building the library:

    $ ./gradlew jar
    

    Examples

    Creating a new GPX object with 3 track-points

    final GPX gpx = GPX.builder()
        .addTrack(track -> track
            .addSegment(segment -> segment
                .addPoint(p -> p.lat(48.20100).lon(16.31651).ele(283))
                .addPoint(p -> p.lat(48.20112).lon(16.31639).ele(278))
                .addPoint(p -> p.lat(48.20126).lon(16.31601).ele(274))))
        .build();

    Writing GPX object to a file

    GPX.write(gpx, Path.of("track.gpx"));

    GPX output

    <gpx version="1.1" creator="JPX - https://github.com/jenetics/jpx" xmlns="http://www.topografix.com/GPX/1/1">
        <trk>
            <trkseg>
                <trkpt lat="48.201" lon="16.31651">
                    <ele>283</ele>
                </trkpt>
                <trkpt lat="48.20112" lon="16.31639">
                    <ele>278</ele>
                </trkpt>
                <trkpt lat="48.20126" lon="16.31601">
                    <ele>274</ele>
                </trkpt>
            </trkseg>
        </trk>
    </gpx>

    Reading GPX object from file

    This example writes a given GPX object to a file, reads it again and prints the WayPoints of all tracks and all track-segments to the console.

    GPX.write(gpx, Path.of("track.gpx"));
    GPX.read("gpx.xml").tracks()
        .flatMap(Track::segments)
        .flatMap(TrackSegment::points)
        .forEach(System.out::println);

    Console output

    $ [lat=48.201, lon=16.31651, ele=283]
    $ [lat=48.20112, lon=16.31639, ele=278]
    $ [lat=48.20126, lon=16.31601, ele=274]
    

    Reading GPX extensions

    The library is also able to read arbitrary GPX extensions.

    <?xml version="1.0" encoding="UTF-8"?>
    <gpx version="1.1" creator="JPX - Java GPX library" xmlns="http://www.topografix.com/GPX/1/1">
        ...
        <extensions>
            <gpxdata:lap xmlns:gpxdata="http://www.cluetrust.com/XML/GPXDATA/1/0">
                <gpxdata:index>1</gpxdata:index>
                <gpxdata:startPoint lat="51.219983" lon="6.765224"/>
                <gpxdata:endPoint lat="51.220137" lon="6.765098" />
            </gpxdata:lap>
        </extensions>
    </gpx>
    

    The extensions are available via a org.w3c.dom.Document object, with an extensions root element.

    final Optional<Document> extensions = gpx.getExtensions();

    Converting a GPX object into an org.w3c.dom.Document

    final GPX gpx = ...;
    
    final Document doc = XMLProvider.provider()
        .documentBuilderFactory()
        .newDocumentBuilder()
        .newDocument();
    
    // The GPX data are written to the empty `doc` object.
    GPX.Writer.DEFAULT.write(gpx, new DOMResult(doc));

    Reading GPX 1.0 and writing GPX 1.1

    By default, JPX is reading and writing the GPX files in version 1.1. But it is possible to read and write GPX files in version 1.0 as well.

    // Reading GPX 1.0 file.
    final GPX gpx10 = GPX.reader(GPX.Version.V10).read("track-v10.gpx");
    
    // Changing GPX version to 1.1.
    final GPX gpx11 = gpx10.toBuilder()
        .version(GPX.Version.V11)
        .build();
    
    // Writing GPX to file.
    GPX.write(gpx11, Path.of("track-v11.gpx"));

    ISO 6709 location strings

    With the LocationFormatter class it is possible to create ISO 6709 compatible strings.

    final Point p = WayPoint.of(...);
    final Location loc = Location.of(p);
    final LocationFormatter format = LocationFormatter.ISO_HUMAN_LONG;
    System.out.println(format.format(loc));

    The printed location will look like this

    24°59'15.486"N 65°14'03.390"W 65.23m
    

    It is also possible to define your own formatter from a given pattern string,

    final LocationFormatter format = 
        LocationFormatter.ofPattern("DD°MMSS dd°mmss");

    which leads to the following output

    24°5915 65°1403
    

    This string can then also be parsed to a location.

    final Location location = format.parse("24°5915 65°1403");

    Geodetic calculations

    Distance between two points

    final Point start = WayPoint.of(47.2692124, 11.4041024);
    final Point end = WayPoint.of(47.3502, 11.70584);
    final Length distance = Geoid.WGS84.distance(start, end);
    System.out.println(distance);

    Console output

    $ 24528.356073554987 m

    Path length

    Calculate the path length of the first track-segment.

    final Length length = gpx.tracks()
        .flatMap(Track::segments)
        .findFirst()
        .map(TrackSegment::points).orElse(Stream.empty())
        .collect(Geoid.WGS84.toPathLength());

    GPX manipulation/filtering

    Filtering

    The following example filters empty tracks and track-segments from an existing GPX object.

    final GPX gpx = GPX.read("track.gpx");
    
    // Filtering empty tracks.
    final GPX gpx1 = gpx.toBuilder()
        .trackFilter()
            .filter(Track::nonEmpty)
            .build()
        .build();
    
    // Filtering empty track-segments.
    final GPX gpx2 = gpx.toBuilder()
        .trackFilter()
            .map(track -> track.toBuilder()
                .filter(TrackSegment::nonEmpty)
                .build())
            .build()
        .build();
    
    // Filtering empty tracks and track-segments.
    final GPX gpx3 = gpx.toBuilder()
        .trackFilter()
            .map(track -> track.toBuilder()
                .filter(TrackSegment::nonEmpty)
                .build())
            .filter(Track::nonEmpty)
            .build()
        .build();

    Changing GPX object

    Fixing the time of all track way-points by adding one hour.

    final GPX gpx = GPX.read("track.gpx");
    
    final GPX gpx1 = gpx.toBuilder()
        .trackFilter()
            .map(track -> track.toBuilder()
                .map(segment -> segment.toBuilder()
                    .map(wp -> wp.toBuilder()
                        .time(wp.getTime()
                            .map(t -> t.plusHours(1))
                            .orElse(null))
                        .build())
                    .build())
                .build())
            .build()
        .build();

    Doing the same only for the GPX way-points.

    final GPX gpx = GPX.read("track.gpx");
    
    final GPX gpx1 = gpx.toBuilder()
        .wayPointFilter()
            .map(wp -> wp.toBuilder()
                .time(wp.getTime()
                    .map(t -> t.plusHours(1))
                    .orElse(null))
                .build())
            .build()
        .build();

    XML configuration

    The JPX library uses the XML classes available in the Java java.xml module. This API is highly configurable, and it is possible to replace the underlying implementation. Especially for Android, using different XML implementation is a necessity. JPX uses three factory classes for reading/writing GPX files:

    1. XMLInputFactory: This class is needed for reading GPX files.
    2. XMLOutputFactory: This class is needed for writing GPX files.
    3. DocumentBuilderFactory: This class is used for creating XML-documents for the GPX extensions data.

    You can change the used classes by implementing and registering a different XMLProvider class. The following code show how to change the configuration of the DocumentBuilderFactory class.

    package org.acme;
    final class ValidatingDocumentBuilder extends XMLProvider { 
        @Override
        public DocumentBuilderFactory documentBuilderFactory() { 
            final DocumentBuilderFactory factory = 
                DocumentBuilderFactory.newInstance();
            factory.setValidating(true);
            factory.setNamespaceAware(true);
            return factory; 
        }
    }

    And remember to create a META-INF/services/io.jenetics.jpx.XMLProvider file with the following content:

    org.acme.NonValidatingDocumentBuilder
    

    License

    The library is licensed under the Apache License, Version 2.0.

    Copyright 2016-2025 Franz Wilhelmstötter
    
    Licensed under the Apache License, Version 2.0 (the "License");
    you may not use this file except in compliance with the License.
    You may obtain a copy of the License at
    
    http://www.apache.org/licenses/LICENSE-2.0
    
    Unless required by applicable law or agreed to in writing, software
    distributed under the License is distributed on an "AS IS" BASIS,
    WITHOUT WARRANTIES OR CONDITIONS OF ANY KIND, either express or implied.
    See the License for the specific language governing permissions and
    limitations under the License.
    

    Release notes

    Improvements

    • #186: LENIENT mode allows GPX tags without creator attributes.

    Improvements

    • #183: Update Gradle to 8.11 and improve build scripts.
    • #181: Update code examples in README.

    Improvements

    • #170: GPX files with invalid version number are now readable in LENIENT mode.
    final GPX gpx;
    try (InputStream in = new FileInputStream(resource)) {
    	gpx = GPX.Reader.of(Mode.LENIENT).read(in);
    }

    Bugs

    • #167: Fixing a test case for Windows.

    Bugs

    • #162: Elevation serialization for values > 1000m is incompatible with deserialization.

    Improvements

    • #125: Breaking change – Use Instant instead of ZonedDateTime for Point.time property.
    • #148: Breaking change – Update to Java17.
    • #155: Improved GPX.Reader and GPX.Writer classes.
    • #158: Add XML Document reader/writer methods.
    final GPX gpx = ...;
    
    final Document doc = XMLProvider.provider()
        .documentBuilderFactory()
        .newDocumentBuilder()
        .newDocument();
    
    // The GPX data are written to the empty `doc` object.
    GPX.Writer.DEFAULT.write(gpx, new DOMResult(doc));

    Bugs

    • #151: Double‘s being written as exponents in GPX file.
    • #152: LocationFormatter::parse method is not thread-safe.
    Visit original content creator repository https://github.com/jenetics/jpx